Building Custom Moodle Plugins: A Step-by-Step Guide for PHP Developers


TL;DR
Building custom plugins is a great way to tailor Moodle to your exact educational needs. Learn how to create a custom Motivational Quotes block plugin step-by-step with PHP, access checks, language strings, and XMLDB integration.
Table of Contents
Building custom plugins is the single most effective way to make Moodle LMS work exactly how your institution or business needs. When developers first start customizing Moodle, the framework architecture can seem complex—but once you break it down into modular steps, creating custom blocks and tools is straightforward and highly manageable.
\n\nIn this practical tutorial, we will walk you through building your first custom Moodle block plugin from scratch. We'll cover folder setup, version management, security access controls, language internationalization, block class logic, and advanced features like database storage and custom CSS/JS styling.
\n\n\n What You'll Need Before Starting
\n\nBefore diving into code, ensure your local development workspace meets these prerequisites:
\n\n- \n
- A working Moodle installation (local development environment like XAMPP, MAMP, or Docker for sandbox testing). \n
- Basic PHP knowledge (object-oriented PHP basics, array handling, and class inheritance). \n
- Understanding of HTML & JavaScript for rendering frontend layout elements. \n
- A code editor such as Visual Studio Code, PHPStorm, or Sublime Text. \n
- A bit of patience—mastering Moodle's boilerplate structure pays off immediately! \n
Understanding Moodle Plugin Types
\n\nMoodle features a highly extensible modular architecture. Depending on your project requirements, Moodle supports several primary plugin types:
\n\nActivity Modules
\nAdd interactive learning tasks, assignments, quizzes, or custom gradeable tools directly into course sections.
\nSidebar Blocks
\nDisplay auxiliary information, student widgets, progress trackers, or interactive tools on sidebars or dashboards.
\nThemes
\nCustomize the visual appearance, color scheme, typography, and responsive grid system across the entire LMS site.
\nAuthentication & Admin Tools
\nControl SSO login flows, OAuth integration, user sync, automated reporting, and bulk admin operations.
\nFor this tutorial, we will build a Sidebar Block plugin named motivational_quotes. Blocks are the best plugin type to start with because they cover core Moodle APIs (capabilities, lang strings, renderers) with minimal boilerplate.
Step 1: Set Up Your Plugin Folder Structure
\n\nFirst, let's create our plugin directory inside the Moodle codebase:
\n\n- \n
- Open your Moodle installation directory. \n
- Navigate to the
/blocksfolder. \n - Create a new directory named
motivational_quotes. \n
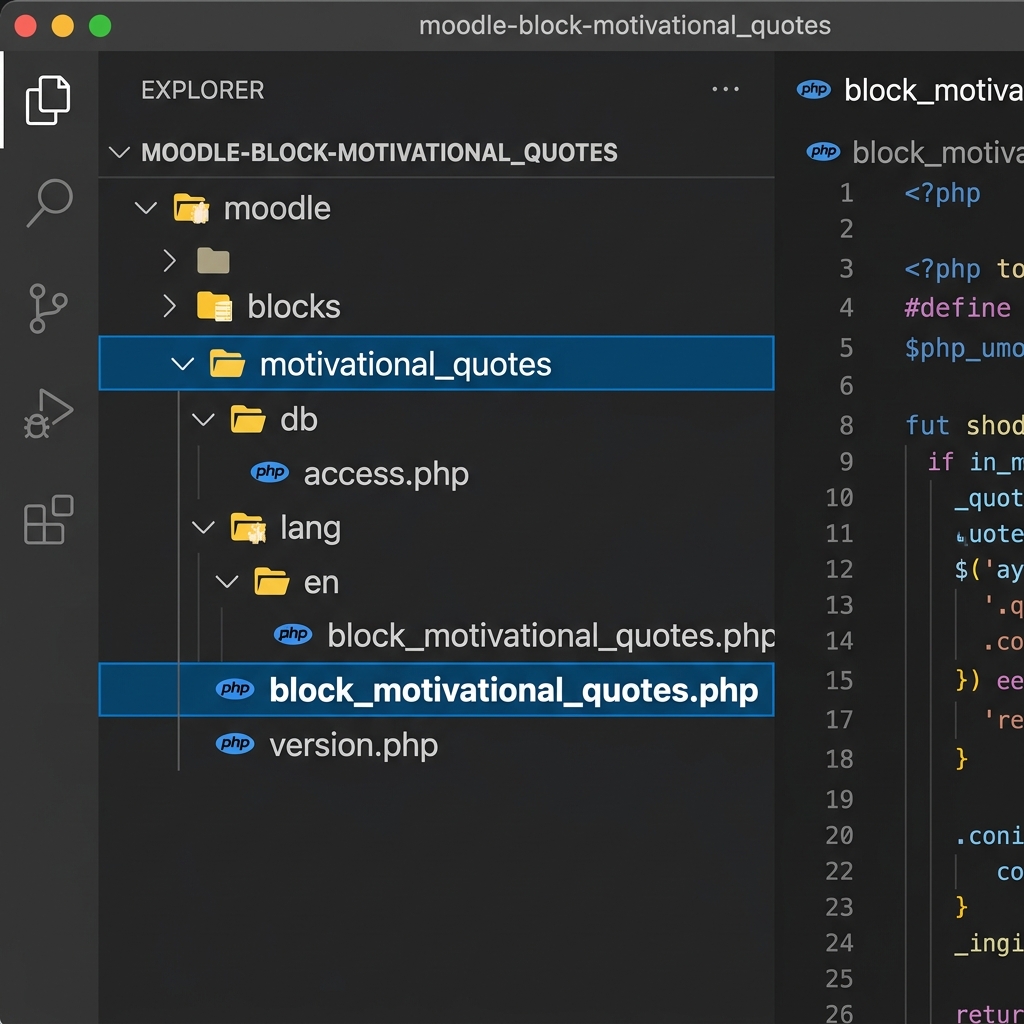
Inside your new /blocks/motivational_quotes/ directory, set up the required file structure:
 \n
\n - \n
block_motivational_quotes.php— The primary class file containing block logic and rendering code. \n version.php— Plugin metadata, release versioning, and core Moodle version requirements. \n db/access.php— Capability definitions, user roles, and security permissions. \n lang/en/block_motivational_quotes.php— English internationalization language strings. \n
Step 2: Define Your Plugin Version (version.php)
\n\nOpen version.php and insert the following code:
<?php\ndefined('MOODLE_INTERNAL') || die();\n\n$plugin->component = 'block_motivational_quotes';\n$plugin->version = 2025051100; // YYYYMMDDXX format date version\n$plugin->requires = 2023042400; // Minimum required Moodle release\n$plugin->release = 'v1.0';\n$plugin->maturity = MATURITY_STABLE;\nHow it works: The initial line defined('MOODLE_INTERNAL') || die(); prevents direct browser access to PHP files for security. The $plugin->component sets the frankenstyle plugin name, $plugin->version specifies the release timestamp, and $plugin->requires enforces minimum Moodle core compatibility.
Step 3: Set Up Language Strings (lang/en/block_motivational_quotes.php)
\n\nNever hardcode text in Moodle files. Use language files so your plugin can easily be localized into multi-language sites. Create lang/en/block_motivational_quotes.php:
<?php\n$string['pluginname'] = 'Motivational Quotes';\n$string['motivational_quotes'] = 'Motivational Quotes';\n$string['motivational_quotes:addinstance'] = 'Add a new Motivational Quotes block';\n$string['motivational_quotes:myaddinstance'] = 'Add a new Motivational Quotes block to Dashboard';\nThese strings define user-facing labels in Moodle's UI. The pluginname key identifies your block in the admin menu, while addinstance and myaddinstance define capability labels for course pages and personal user dashboards.
Step 4: Define Access Capabilities (db/access.php)
\n\nSecurity permissions are controlled via db/access.php. Add the following code:
<?php\ndefined('MOODLE_INTERNAL') || die();\n\n$capabilities = array(\n 'block/motivational_quotes:addinstance' => array(\n 'riskbitmask' => RISK_SPAM | RISK_XSS,\n 'captype' => 'write',\n 'contextlevel' => CONTEXT_BLOCK,\n 'archetypes' => array(\n 'editingteacher' => CAP_ALLOW,\n 'manager' => CAP_ALLOW\n ),\n 'clonepermissionsfrom' => 'moodle/site:manageblocks'\n ),\n 'block/motivational_quotes:myaddinstance' => array(\n 'captype' => 'write',\n 'contextlevel' => CONTEXT_SYSTEM,\n 'archetypes' => array(\n 'user' => CAP_ALLOW\n ),\n 'clonepermissionsfrom' => 'moodle/my:manageblocks'\n ),\n);\nThis configuration grants editing teachers and site managers permission to add the block on course sections, while allowing general students/users to add the block to their individual Moodle Dashboard.
\n\nStep 5: Create the Main Block Class (block_motivational_quotes.php)
\n\nNow, write the primary block logic in block_motivational_quotes.php:
<?php\ndefined('MOODLE_INTERNAL') || die();\n\nclass block_motivational_quotes extends block_base {\n \n public function init() {\n $this->title = get_string('pluginname', 'block_motivational_quotes');\n }\n\n public function get_content() {\n if ($this->content !== null) {\n return $this->content;\n }\n\n $this->content = new stdClass();\n \n $quotes = array(\n '"The secret of getting ahead is getting started." – Mark Twain',\n '"Don\'t watch the clock; do what it does. Keep going." – Sam Levenson',\n '"Learning is a treasure that will follow its owner everywhere." – Chinese Proverb',\n '"The more that you read, the more things you will know." – Dr. Seuss',\n '"Education is the passport to the future." – Malcolm X'\n );\n\n $randomQuote = $quotes[array_rand($quotes)];\n $this->content->text = '<div class="quote-box" style="padding:15px; background:#f0fdf4; border-left:4px solid #10b981; font-style:italic;">' . $randomQuote . '</div>';\n $this->content->footer = '';\n\n return $this->content;\n }\n\n public function applicable_formats() {\n return array('all' => true);\n }\n\n public function instance_allow_multiple() {\n return true;\n }\n}\nClass breakdown:
\n\n- \n
init(): Sets the block's title dynamically usingget_string(). \n get_content(): Generates the HTML body. It selects a random quote from our array and caches output in$this->content. \n applicable_formats(): Specifies that the block can be added anywhere across Moodle pages. \n instance_allow_multiple(): Permits multiple instances of this block on a single page. \n
Step 6: Install & Test Your Plugin
\n\nNow install your newly created Moodle plugin:
\n\n- \n
- Log into your Moodle site as an Administrator. \n
- Navigate to Site Administration > Notifications (or Dashboard). \n
- Moodle will automatically detect
block_motivational_quotesand prompt you to run the upgrade check. \n - Click Upgrade Moodle database now to register capabilities and version info. \n
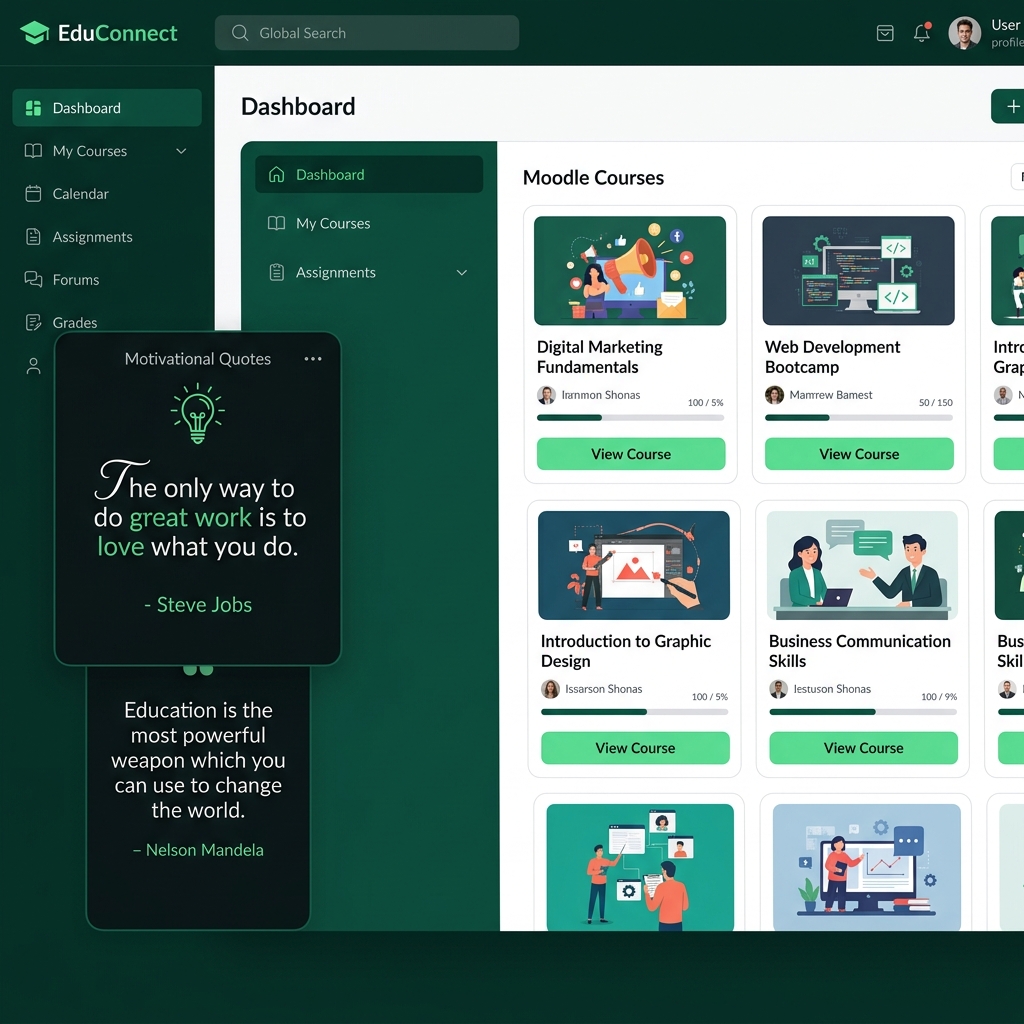
- Navigate to any course or your Dashboard, click Turn editing on, and click Add a block. \n
- Select Motivational Quotes from the menu! \n
 \n
\n Making Your Plugin More Advanced
\n\nOnce your basic block is working, here is how you can take it to a production level:
\n\n1. Adding Admin Configuration Options (settings.php)
\n\nTo allow admins to input custom quotes instead of static array values, create a settings.php file inside your plugin folder. This renders form fields in Site Administration > Plugins > Blocks > Motivational Quotes, allowing admins to edit quotes dynamically. Your block then retrieves settings using get_config('block_motivational_quotes').
2. Creating Custom Database Tables (db/install.xml)
\n\nIf your plugin needs to store complex data (e.g., student response logs or quote voting history), create a db/install.xml file. Use Moodle's built-in XMLDB Editor (found under Site administration > Development > XMLDB editor) to generate table definitions visually.
Once installed, interact with your table using Moodle's global $DB object instead of raw SQL queries:
// Inserting a record safely\nglobal $DB;\n$record = new stdClass();\n$record->quote = "Knowledge is power.";\n$record->author = "Francis Bacon";\n$record->timecreated = time();\n$DB->insert_record('block_motivational_quotes', $record);\n\n// Fetching records\n$user_quotes = $DB->get_records('block_motivational_quotes', array('author' => 'Mark Twain'));\n3. Custom Styling & Interactive JavaScript
\n\nAdd a styles.css file in your plugin root for custom CSS styles (Moodle automatically loads styles.css for active blocks). For interactive AJAX features or animations, load modular JavaScript assets via $PAGE->requires->js('/blocks/motivational_quotes/script.js');.
Common Moodle Developer Pitfalls to Avoid
\n\n1. Skipping Capability Checks
\nAlways verify permissions using has_capability() or require_capability() before allowing users to perform actions or view sensitive course data.
2. Hardcoding User Interface Text
\nAlways wrap UI text in get_string(). Hardcoded strings break Moodle multi-language sites and translation plugins.
3. Writing Raw SQL Queries
\nNever write direct SQL string concatenation. Use Moodle's $DB API parameter binding (e.g. $DB->get_records_select()) to prevent SQL injection vulnerabilities and cross-database errors between PostgreSQL, MySQL, and MariaDB.
4. Not Testing Across Different Moodle Themes
\nCustom themes like Boost, Classic, or Remui handle grid layouts differently. Test your blocks across multiple themes to ensure responsive display.
\nNeed Professional Moodle Plugin Development & Migration?
\nWhether you need custom plugin development, bespoke theme integration, LMS performance tuning, or seamless site migration, our expert team builds and delivers enterprise-grade Moodle solutions tailored for your business.
\n \nWrapping Up
\n\nMoodle plugin development isn't as intimidating as it first appears. By starting small with basic blocks, understanding Moodle's folder conventions, and adhering to core security APIs, you can construct powerful extensions for any e-learning platform.
\n\nWhen you run into roadblocks, the official Moodle Developer Documentation and Moodle Community Forums provide an active ecosystem of guidance. Happy coding!


Was this article helpful?
Comments
Loading comments...